

If you’re looking to elevate your acrylic painting game, understanding the art of blending can unlock a world of vibrant possibilities for your artwork. Blending techniques allow you to create stunning visual effects, making your paintings come to life, whether you’re capturing the soft hues of a sunset or the intricate details of natural landscapes. In this comprehensive guide, we will delve into what blending means, how it differs from traditional paint mixing, and explore several essential blending techniques that every artist should know.
What Is Blending in Acrylic Painting?
Blending in acrylic painting refers to the process of smoothly transitioning between two or more colors, allowing them to coexist in a fluid manner on the canvas. Unlike mixing, where pigments combine to create a new, uniform color, blending maintains distinct color areas while creating gradients and soft transitions. A compelling example of blending is illustrated in sunsets, where you can observe the beautiful gradation from vibrant reds to soft oranges and finally to gentle yellows. This nuanced interaction of colors adds depth, dimension, and emotional resonance to your compositions.
Key Differences Between Blending and Mixing Colors
To clarify, blending and mixing are fundamentally different practices:
- Blending involves layering colors in a way that they are visually distinct, creating a gradient or ombré effect. You typically still see the original colors, allowing the viewer’s eye to appreciate the transition.
- Mixing, on the other hand, combines colors thoroughly to form a new pigment, meaning the original colors are lost in the process.
5 Essential Blending Techniques for Acrylic Artists
As we explore blending techniques, remember that practice is key. Start with simple projects and gradually apply more complex blending as you gain confidence. Here are five methods worth mastering:
1. Horizontal Wet-on-Wet Blending
This technique involves applying wet paints together on the canvas, allowing them to naturally mix and create seamless transitions. To achieve horizontal wet-on-wet blending:
- Step 1: Load your flat brush (a filbert or a round brush can also work) with your first color, like a bright yellow.
- Step 2: Apply the yellow across the canvas using a left-to-right motion while ensuring the paint layer is even.
- Step 3: Without rinsing your brush, load it with a second color, such as orange. Paint this color below the yellow and gently blend the orange upwards into the yellow.
- Result: This technique works wonderfully for depicting elements such as dawn and dusk skies, oceans, or even fabric textures.
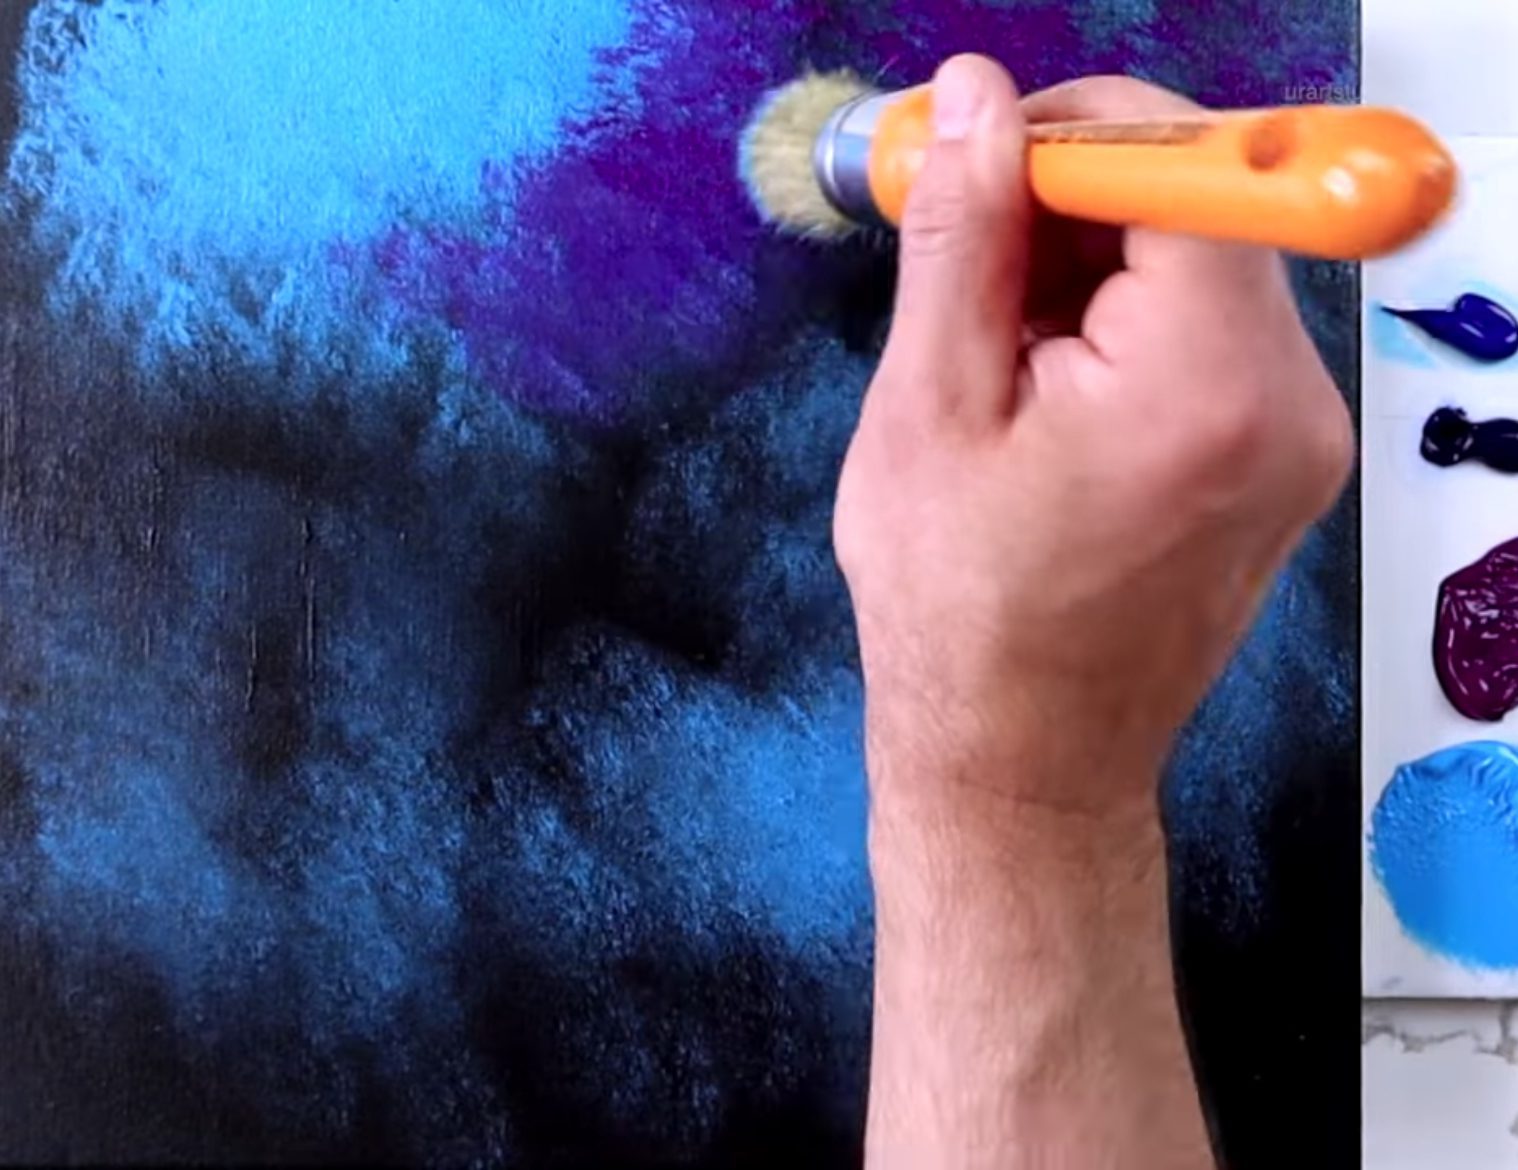
2. Circular Wet-on-Wet Blending
This method uses a circular motion to create a more dynamic interaction between colors. Here’s how you do it:
- Step 1: Start by creating a small circle of a light color, such as white.
- Step 2: Mix a secondary color (like pink) on your palette and paint it around the white circle.
- Step 3: Use circular brush strokes to blend the pink into the white, softening the edges.
- Step 4: Add deeper colors (like red) to the outer circle and blend towards the pink.
- Result: This technique is particularly effective for galaxies, floral designs, or even textures resembling wood or desert landscapes.
3. Double Load Wet-on-Wet Blending
This technique involves using a single brush loaded with two different colors. It creates a gradient or dual-toned effect without losing the individual color characteristics. Here’s a step-by-step guide:
- Step 1: Load one side of your brush with a vibrant shade, like cobalt blue, and the other side with a lighter color, such as white.
- Step 2: Brush up and down on your canvas, allowing the two colors to blend without fully merging them.
- Result: This technique is ideal for rendering effects like wood grains, water reflections, or forest shades where you want to maintain visual interest.
4. Wet-on-Dry Blending (Dry Brushing)
In this method, you combine wet and dry layers to achieve a gradient effect. It’s particularly good for beginners, as it allows for more control over the blending process. Here’s how:
- Step 1: Paint a darker base coat on your canvas and let it dry.
- Step 2: Using a lighter color, paint along the edge of the dry area and use large strokes to pull the lighter color upwards, gradually using less paint to create a gradient.
- Result: This technique is fantastic for creating texture in landscapes, fur or hair details, and soft shadows.
5. Acrylic Glazing for Blending
Acrylic glazing adds depth and richness to your paintings. It involves mixing glaze with color to allow for a longer working time and smoother application. Here’s how to effectively use this technique:
- Step 1: Begin with a solid background of your darker color.
- Step 2: Mix a bit of acrylic glazing medium with a lighter color (such as yellow) on your palette.
- Step 3: Apply the glaze over your base layer, using sweeping motions to blend inward from the edges.
- Result: This technique can enhance the appearance of marble, shiny surfaces, or atmospheric light effects, giving your work a polished and professional finish.
Tips for Successful Blending
- Use Quality Tools: Invest in good brushes and acrylic paints. A combination of synthetic brushes designed for acrylics will yield the best results.
- Work Quickly: Acrylic paints dry fast, so be prepared to blend as you work to ensure the colors stay wet enough to merge nicely.
- Practice Patience: Allow layers to dry where appropriate, particularly for wet-on-dry techniques. This helps create cleaner blends and adds depth.
- Experiment: Don’t hesitate to try different color combinations and techniques to discover what feels right for your artistic style.
Conclusion
As you embark on your acrylic painting journey, remember that the techniques you’ve learned here are just the beginning. To further enhance your skills and dive deeper into the world of painting, we invite you to explore UrartStudio. Our website is a treasure trove of valuable resources tailored for artists of all levels, including in-depth painting tips, step-by-step instructions, and a wealth of inspiration for your next masterpiece.
In addition to painting techniques, you’ll find a curated selection of unique and high-quality paint brushes designed to elevate your creative experience. Whether you’re looking to refine your blending skills or experiment with new styles, Urart Studio has everything you need to create stunning acrylic paintings. Visit us today and unlock your artistic potential! Happy painting!
AcrylicPainting, #ArtTechniques, #PaintingTips, #CreativeJourney, #UrartStudio
Leave a Reply
You must be logged in to post a comment.