🖌️
🌟
Unlock the Mysteries of Light and Shadow with an Enchanting Ice Cube Landscape.
Introduction: A Frosty, Dreamlike Exploration
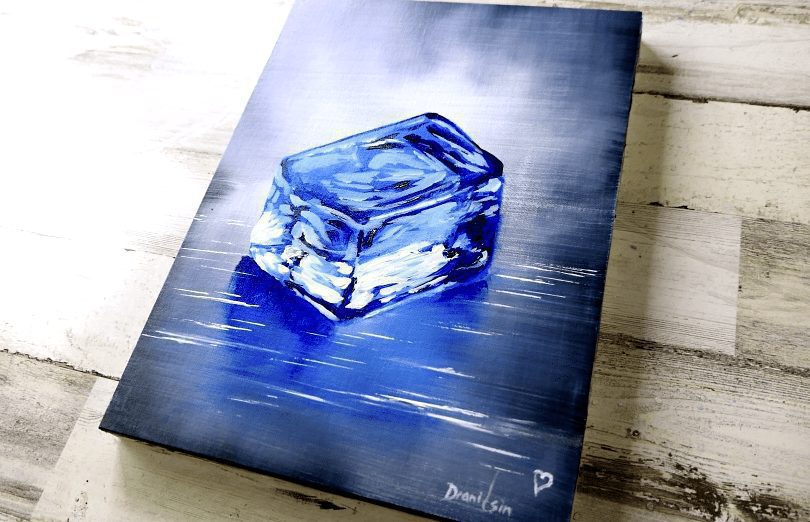
The art of creating a captivating blue ice cube acrylic painting is a visually mesmerizing experience that challenges your technique while pushing the boundaries of creativity. Let’s transform a basic ice cube into a stunning centerpiece of contemporary landscape art! Using step-by-step painting tips and professional acrylic techniques, we’ll guide you through bringing the icy subject to life with radiant colors, exquisite textures, and fine detail.
Are you ready to embark on this chillingly cool experiment? Let your brushes do the magic as you follow along in this exciting Member-Only project tutorial.
🖌️
Materials You’ll Need
To recreate the brilliance of the Blue Ice Cube, start with these materials:
- Acrylic Paints: Shades of blue, white, gray, and touches of black. (Link to paint supplies here)
- A sturdy canvas or painting board (recommended: 8×10 or 12×12).
- Brushes of varying sizes – we’ll need fine detail brushes and flat wash brushes! Grab them here.
- Palette and water jar.
- Palette knife for texture (optional).
- Pencil or chalk to outline.
Let’s dive in and bring this icy masterpiece to life with professional painting techniques!
🔹 Step 1: Sketching the Foundation
It all starts with a strong foundation! Lightly outline your blue ice cube using a pencil or chalk. Observe symmetry and angles, as these give the cube its sharp, crystalline quality. Then, add depth by sketching jagged edges and cracks, which will enhance its realistic textures later.
Tip: Focus on perspective! Play with tilted angles to add a dramatic and dynamic feel to your composition.
🔹 Step 2: Building the Background
No detail exists in isolation – so let’s create an ambient backdrop that makes this landscape painting pop!
- Start with a gradient: Blend soft whites, muted grays, and cool blues to evoke a chilly atmosphere. Use a flat wash brush for smooth application (click here for ideas to inspire your background).
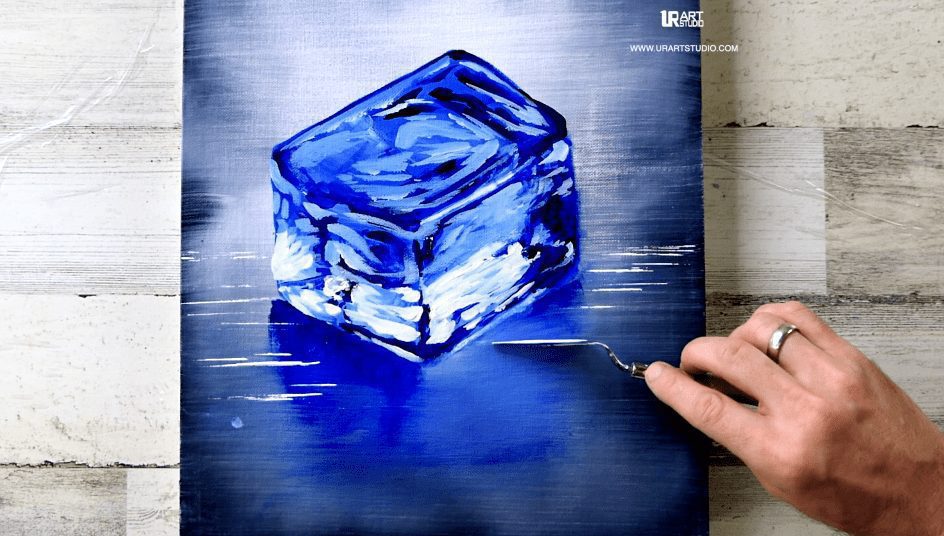
- Add depth: Layer soft strokes of darker tones horizontally, resembling frosty streaks or icy surfaces.
Pro Painting Tip: Dry brushing is perfect here for frost-like texture! Create a transparent, icy haze by running your brush with minimal paint over the surface.
🔹 Step 3: Sculpting the Cube in Acrylic Layers
A blue ice cube is a stunning interplay of transparency, light, and shadow. Here’s how to approach it:
- Base Layer: Fill the cube with pale blue, ensuring even coverage. Work acrylic paint thinly at first – you’ll add opacity later.
- Add highlights: Brighten the corners and edges with sharp painting techniques using pure white or cream tones (See more step-by-step tutorial inspirations here).
- Deepen the shadows: Use a mix of blue and gray for internal cracks and shading. Add layered brushstrokes to mimic the fractured and liquid characteristics of real ice.
Advanced Painting Tip: To create a hyper-realistic feel, glaze with thin transparent layers of blue over the edges. Use small, circular brushes for precision (check brush kits here).
🔹 Step 4: Refining the Realism
Here’s where the fun begins! Add the crucial details that make your cube feel “alive”:
- Crack effects: Using a palette knife and a thin wash of white, create subtle jagged lines inside the cube. Painting techniques such as ‘feathering’ can give these lines a diffused look.
- Reflections & Glow: Mix white with a hint of metallic blue to create lustrous reflections both inside and outside the cube. Apply these highlights sparingly for maximum impact.
- Water Droplets (Optional): To heighten realism, scatter dew drops around the cube. Use a fine detail brush to paint small circular reflections on top of the background surface.
Imagine creating texture so vivid, your art feels almost icy to the touch!
🔹 Step 5: Adding Final Touches
Now, step back and evaluate your landscape art composition:
- Use softer stippling techniques to blend any harsh strokes in your background.
- Add faint icy mist bordering the cube for an ethereal, atmospheric effect.
- If you’re feeling bold, include additional smaller ice fragments around the main cube for a storytelling dynamic.
When you’re done, allow your painting to dry completely before applying a gloss varnish to protect and bring out the shine! (Don’t skip varnishing as it heightens the icy illusion – see suggestions here).
Congratulations – you’ve brought the cold magic of ice to life on canvas!
🌟
Why This Painting is Perfect for Artists
The Blue Ice Cube tutorial isn’t just exciting – it’s an opportunity to refine your acrylic painting skills dramatically. Mastering its crisp edges, fragment details, and reflective surfaces will strengthen your ability to create other landscape paintings and translucent objects. Challenge yourself and bask in your artistic growth!
Bonus Skill Takeaway:
Practice precision, layered glazing, and attention to subtle light transitions – these are painting tips that’ll elevate all your future works.
🛒 Upgrade Your Studio Supplies
Ready to take this step-by-step painting tutorial even further? Explore premium brushes and supplies to elevate your skills:
Become the artist you’ve always dreamed of being!
Keyword List
Blue Ice Cube painting, landscape painting tutorial, acrylic painting tips, professional painting techniques, step-by-step landscape painting, painting brushes, realistic acrylic painting, creating ice reflection art
Hashtag List
#AcrylicPaintingTips, #StepByStepCraft, #LandscapePaintingTutorials, #ArtForBeginners, #AdvancedArtTips, #IceCubeArt, #RealisticPainting, #PaintingReflectionArt
‘Blue Ice Cube’ – https://youtu.be/cG-vcG1rB1Y
Member Only Art Videos: https://www.youtube.com/channel/UC3hCdJZXe9k52K6FIzUBLeA/join


BY HELLENA


Leave a Reply
You must be logged in to post a comment.