
Original article with illustrations: https://arteza.com/blogs/articles/deep-green-forest-painting-with-peter-dranitsin
RECOMMENDED ART SUPPLY
Medium: acrylics
TOOLS:
- 1″ flat brush,
- oval brush,
- palette knife,
- liner brush,
- #4 angled brush
- brush washing bucket
- clean and dry towel (to wipe your brushes dry)
COLORS:
- •prussian green,
- •cobalt blue,
- •titanium white,
- •payne’s grey
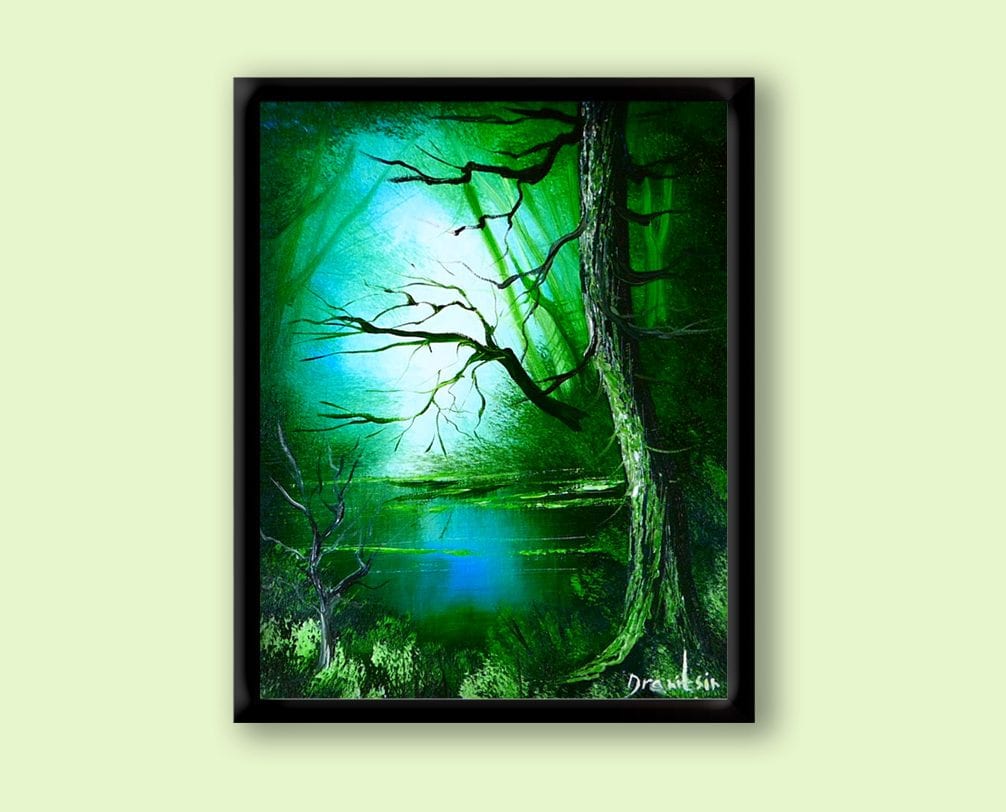
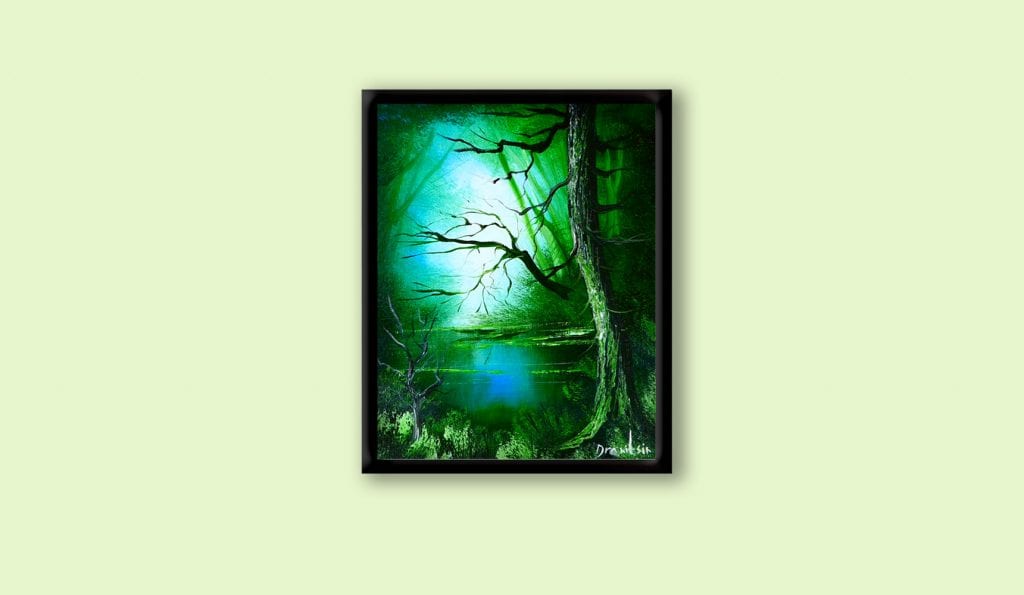
TITLE & THEME: ‘The Sound of Silence’ – deep green landscape painting
CANVAS: 11×14 inches
- Prepare your canvas by positioning it vertically & spraying small amount of water to the canvas surface. Using clean cloth wipe off the access water.
NOTE: wet surface will allow you more working time with acrylic paint before it dries. It also helps to spread the paint easier.
List of supplies:
Acrylic paint: Prussian Green, Cobalt Blue, Titanium White, Payne’s Grey
11×14” Canvas
1″ Flat brush
Oval brush
Palette knife
Liner brush
#4 Angled brush
Brush washing bucket
Clean, dry towel
Step 1 – Prepare your canvas
Prepare the canvas by positioning it vertically and spraying a small amount of water onto the surface. Using a clean, dry cloth, wipe off the excess water. A wet surface will allow you to more easily spread the paint and increase your working time.
Green Forest
Step 2 – Create light
Determine where the light source is coming from. Using a 1” flat blending brush, add a small amount of Cobalt Blue around the light.
Green Forest
Step 3 – Adding background colors (stage 1)
Add Prussian Green around the blue. By adding a darker color around a lighter one you create the illusion of depth.
Green Forest
Step 4 – Adding background colors (stage 2)
In a similar way, add some Payne’s Grey around the Prussian Green, slightly overlapping the green, but making sure not to cover it completely.
Green Forest
Step 5 – Blending the background
With one side of the oval brush, start blending all background colors. Always start from the lightest area and move towards the darker tones. This will ensure that your blending will be clean and consistent.
Turn the brush in a circular motion in order to keep using the clean side for blending the unblended areas.
When your brush gets too much paint on all sides, swish it in the brush washing bucket and wipe clean on a dry towel.
Repeat the entire process for the smoothest blending results.
In a similar way, add Prussian Green around the blue area. You can spread this color all the way to the very edges of the canvas. Once again, by adding a darker color around the lighter ones you are creating more depth.
Do not blend color at this point yet. This will be done later on.
Green Forest
Step 6 – Divide into 2 sections
Divide the canvas into two sections—upper and lower. Do this by blending to create a darker green color to divide it. This will be our distant shoreline. Make sure not to cover the entire lower section with the dark paint colors.
Green Forest
Step 7 – Water reflection (stage 1)
Using a 3-inch flat blending brush, create the effect of water by lightly smudging the paint downward, starting from the very tip of the distant shoreline. At first, only use straight downward, vertical brush strokes, moving your brush horizontally from left to right. Then change directions, using the same downward, vertical strokes.
Apply light pressure
After each stroke, wipe your brush on a clean, dry cloth to remove any excess paint.
Green Forest
Step 8 – Painting distant trees
With a clean, angled brush create distant tree trunks by simply drawing them in.
As you draw the trees, pick up some darker paint with your brush to add a variety of shades of tree trunks. Make some tree trunks darker than others as if they are closer to the viewer and/or positioned in a shadier area.
Green Forest
Step 9 – Creating details (stage 1)
Use the liner brush to create detailed trees using darker colors. Remember, the closer the tree is to the viewer, the more detailed it should become.
Green Forest
Step 10 – Water reflection (stage 2)
Create the tree’s reflection in the water by using the same liner brush. No need to be too detailed here. Just an indication of the tree above for the reflection will do. In the next step, we will smudge the paint to tie in the reflection of the tree with the rest of the reflection in the water.
Green Forest
Step 11 – Water reflection (stage 3)
Blend the reflection of the tree you just created using the 3-inch flat blending brush by applying a very light touch.
Green Forest
Step 12 – Water lines
Using a palette knife, mix together green and white (more green than white). Flatten the colors by using the palette knife directly on your palette. Next, get a small roll of paint on the very tip of the knife. Using a good amount of pressure apply this tip to the canvas. This will separate the water from the land and create small water lines.
Green Forest
Step 13 – Prepare the final layer
Using the clean oval brush, mix Cobalt Blue and Payne’s Grey to cover the bottom portion of the canvas for the final details.
Green Forest
Step 14 – Painting grass (stage 1)
With the oval brush, mix green and white colors together (more white than green) for a lighter shade of green. Load only one side of the brush with this new color mixture. Gently dab your brush on the bottom final layer, creating an illusion of swaying grass. Let the brush bristles to do the work for you. This will give it the details of the grass.
Green Forest
Step 15 – Creating the land
Load the oval brush with a mix of green, blue, and dark grey. Partially cover some of the grass areas you’ve just created. We are now creating the land where our big tall tree will live in our beautiful green landscape.
Green Forest
Step 16 – Painting the big tree
Using the angled brush, load it full of dark colors (mixed with some green and blue). Create a big tree trunk in a designated area close to the right side of the painting.
Green Forest
Step 17 – Adding details to the big tree
Use a palette knife to get a small roll of bright green paint from the earlier mix you created for the water lines. By applying gentle pressure to the canvas, you start creating the tree bark of this big tall tree. Start from the top and systematically move downward. Periodically wipe your palette knife clean, reload, and repeat. Alternate directions as you work—working from top to bottom and vice versa.
Green Forest
Step 18 – Creating tree branches
Load the liner brush full of dark colors and start creating the tree’s branches. It helps to constantly dip your brush in water to make sure your paint has enough liquid to flow properly.
Green Forest
Step 19 – Painting grass (stage 2)
With the oval brush and a light green mixture, create a brighter layer of grass in the foreground. This is the closest area to the viewer, so it should be brighter and have the most detail. As a result, the first darker grass layer is automatically pushed back into the distance.
Green Forest
Step 20 – Final details
As a final touch, paint a small bush or tree in the foreground using a liner brush. Use Payne’s Grey to first outline the general shape of this plant. Highlight one side of it with light colors to give it shape.
Green Forest
Step 21 – Sign your painting
Use the liner brush and a color that stands out to sign your painting.
SUMMERY
With this simple tools, steps and techniques you can really achieve fantastic results! I encourage you to experiment with different themes and colors to see what you can create using these methods. Do not get discouraged if your painting does not turn out exactly how you envisioned it. Like anything in this world – it takes practice to fully master it. Ask your friends or relatives to give you constructive criticism of your painting. Be opened minded to options and criticism and strive to improve with every painting you create. Most importantly enjoy the creation process!.
Happy painting!
Peter Dranitsin